Class work
Tracking shot

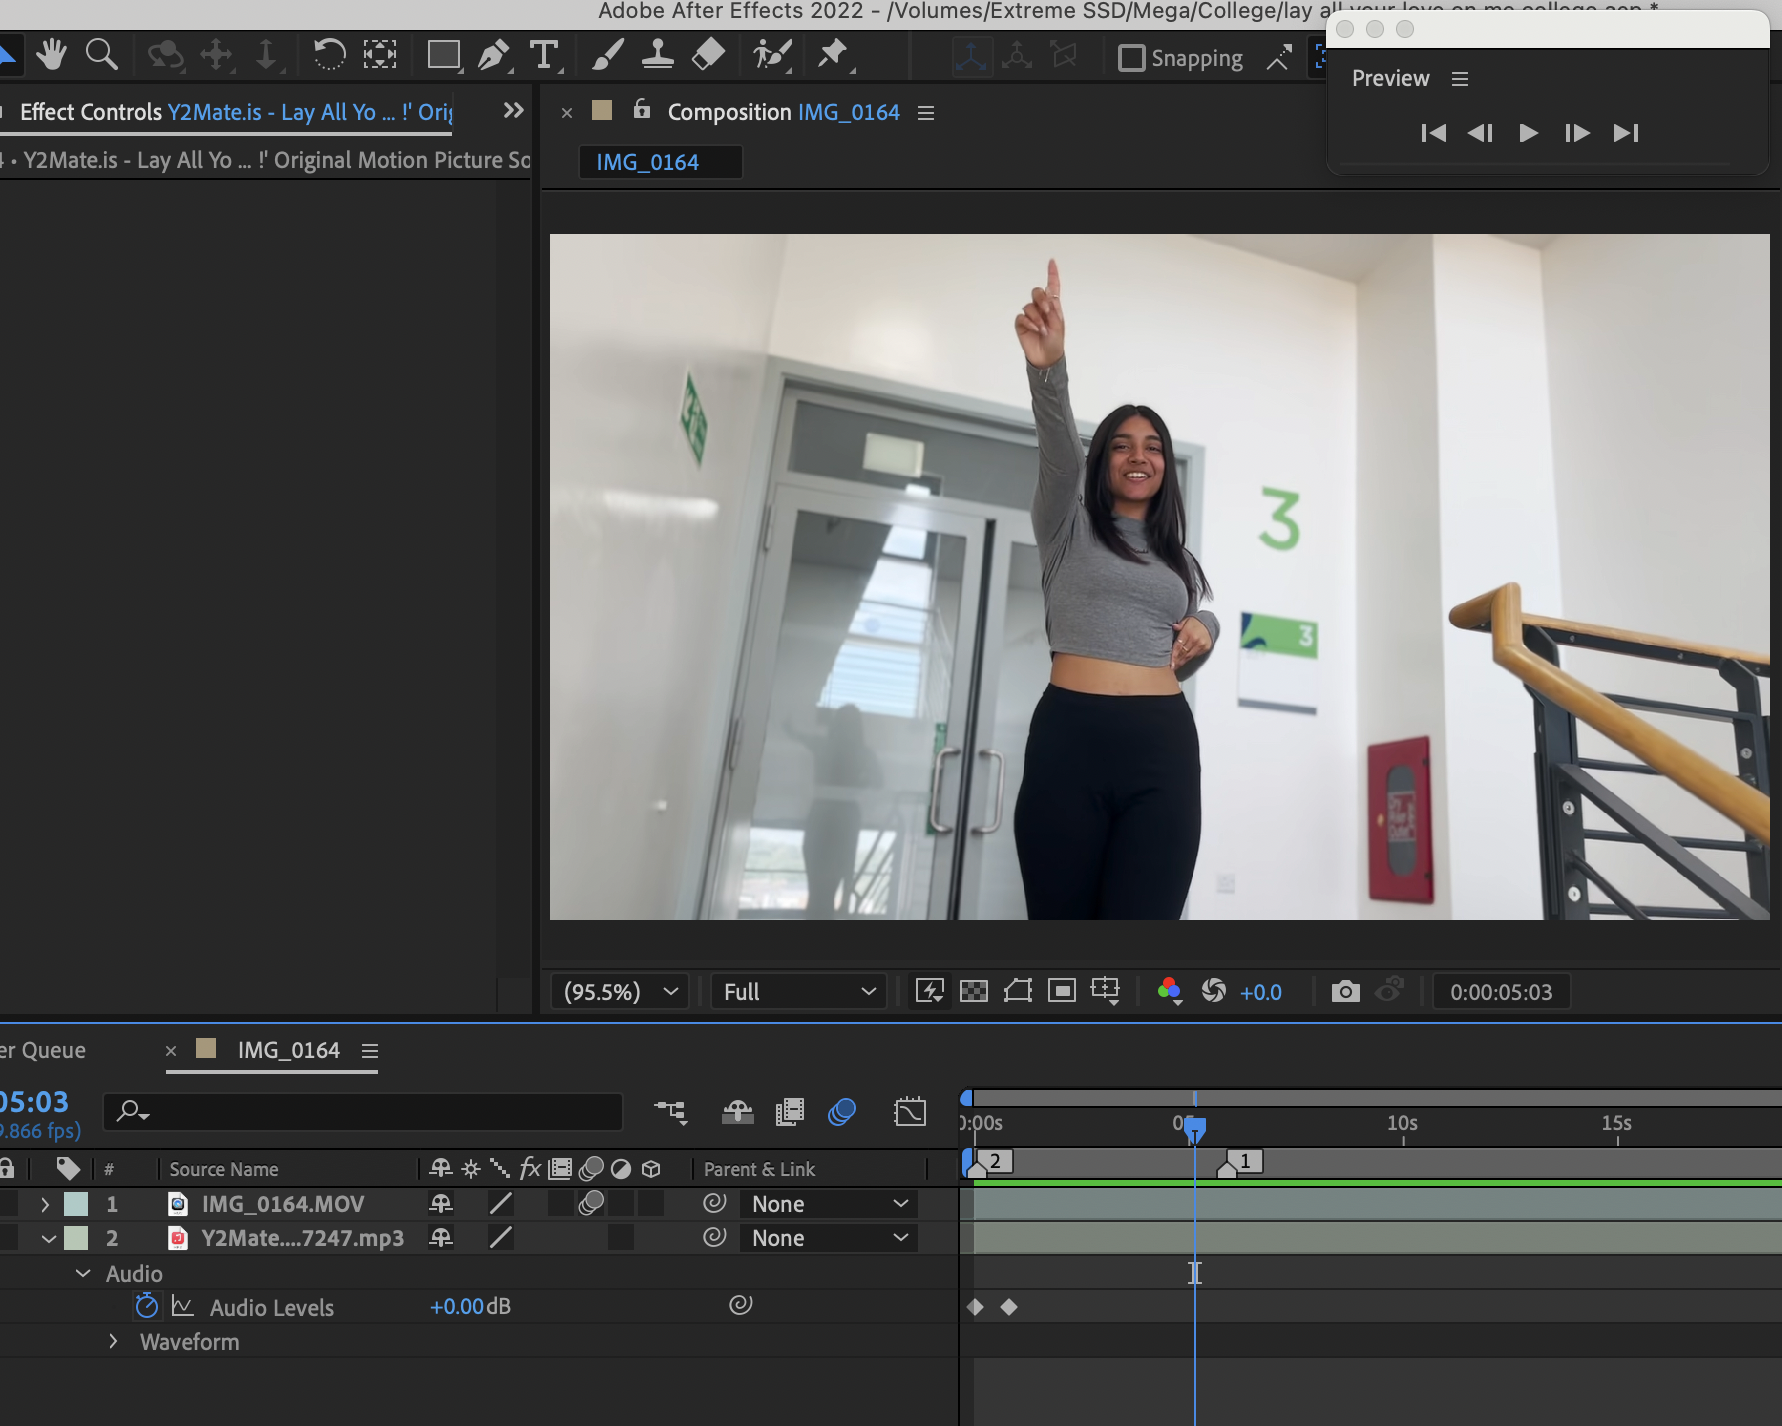
For this task we had to asign roles for oursleves. Heather and Natasha where the actors, Caitlin was the filmer and I played the music helped lead Caitlin through the tracking motions when walking backwards. This arangment worked really well and we did a couple takes after finding things we could do better untill we got it how we wanted.

We chose the song Lay all your love on me from Mamma Mia which heather knew all the lyrics for but Natasha didnt really so when linking the song over the video I used heather as a guide. This made sure it was more accurate and I found it fit really well. We also chose the setting as the staircase as we could have Natsaha walking down and Heather walking up, this added a nice contrast and the spin has the window to the outside showing a nice high view.
I found the moviw version of the song on youtube and downloded it onto my laptop so I could upload it to my After Effects and add it over the video. I imported the video into after Effects and placed the video on top and the audio under. I pressed the mute on the top video so it didnt have any sound and started matching the two videos together finding the right spot in the song. Fidning the right spot for the song was the most difficult bit and I had to redo it many times before I was confident with the placement.

I editted this on After Effects which didnt invlove much, I decided to add a opacity to the end and a audio level fade in and out. For the fade out I started it when heather starts walking away letting the awkward gap with nothing going on be a fading interval. This let the ending be less abrupt and it faded while the song faded which I liked. I started this fade at 0 and ended it at 100.

For the audio levels I stsarted it at -20 and a couple seconds later had it at 0 this made a small fade in. Then I had the ending one start at 0 and end at -30. This one lasted a lot longer than the starting one which made it follow the opacity fading adding more of a neatness.
I then played around witb colourings but couldnt find one I liked so i left it and exported the video and uploded it to youtube.
This task was meant to be done with a gimbal but we found Caitlins phone had a stabilizer in the camrea recording section so we trialed it out and it worked pretty well so we didnt have to use a gimbal. This does mean we are not as familiar with the gimbal but im sure we will work with it in the future.
Keyframe animation
To do this we had a doccument with directions to follow to remake the gorilaz served head music video animation. To start this off I opended up Premire pro and then downloded the images needed from ALO. I imported these images into the Premire Pro project and got ready to start the task.


The first thing I did was drag the background into the timeline allowing the image size to be the main composition size since its the first image placed into the project. After that I aded the title which needed to be scalle down to '75' so it fit in well. This title is going to travel acorss the screen from the right to the left. I made sure you couldnt see the title which meant it started at '2810.0' and ends at '-927.9' so it appears and moves across the screen. This lasted for 12 seconds and around the 8 seconds in the heads start dropping.


The heads are a very slow process of adding and rearanging keyframes to fit your liking. The heads should start of the screen at the top and drop to the bottom. I wanted mine to then bounce back to the top and continue to drop to the bottom. I took on the same kind of idea as the DVD logo. My first two have a very different idea to them. One moves very quickly while the other is a bit more maintained. They both bounce of each other now and then as well until they bounce of the screen and switch with the other two heads. To make this happen I would make a keyframe and move the line over a couple seconds then move the head with the position key to another wall and add another keyframe and continue the process until its bouncing around the screen. At the same time I would change the rotation so the rotation and position keyframes are on top of each other letting it move more smoothly.

Once I repeated this with the other heads that drop onto the screen after the first two I decided I wanted the title to be above the heads so the heads don't cut it off while its still moving out of the frame. I also foun a better process which meant I could have the heads bounce better with the second lot. Instead of doing one head at a time I did two at teh same time so I knew what way the heads went and would direct them both into the right areas. This way was quicker as well as i didnt have to go back a readjust to make sure it bounced off each other well.
I also couldnt find the music file on ALO so the video ended up being exported without it. I then uploded it to youtube and added it to my blog.
Matching clips to the beat
For this task I downloaded the clips needed and uploaded them onto premiere pro. This consisted of a music track and a video of someone driving a car.

The first thing I did was drag the music track in and start adding markers to indicate where I want to change scenes. I did this for around 30 seconds off the track. By doing this I could decide the type of pace I was having and how the video would end up looking. I wanted the intro to have cuts in it with a slower pace showing everything thats happening; gear stick, pedals, mirror, wheel and her face in different angles. By using these I could easily match what she was doing to the beat, for example her pressing the pedal on beat. Sometimes I changed the clip on the beat or other times I let her action be the beat. The use of multiple scenes keeps you guessing and keeps it moving even with its slower pace. In contrast the main part of the track is very busy with loads of beats, so I decided to stick with the consistent one which kept a manageable pace but the scenes used make it look crazy and jam-packed. The camera work on these clips are handheld making some parts unstable. I used those scenes in the main part as I thought it portrayed what the music is showing. These scenes also showed the view out of the front window which gives you a POV view, I thought this was a nice switch up.

Then I added a black screen in the middle of the two parts. I found a gear change which worked really well on a beat as the clip lined up well. The only issue is to have the gear change work on beat meant having a black section as the clip was not long enough. I think this worked well though adding a dramatic effect before it exploded and went crazy.
What I could off done though was add an opacity from the gear change clip to the black screen. It would have created a soother transition even though I wanted it to be harsh. It would overall make it look cleaner, and as I rushed completing this task I didn't rewatch it to see if there was anything else I wanted to add.


On certain parts like the end I faded the clip out using opacity. To do that I made a keyframe half way through the clip at 100 and then at the end have a keyframe at 0. This fades the clip out. I wanted the music to fade out with the clip as well, which basically means I did the same thing but with bypass levels. What I found though was I had the levels on -20 already cause I found them really loud. So at the same point as the other clip I had a keyframe at -20 and then at the end of the music track I made a keyframe of -80 since that will defiantly reduce the sound enough.
After this I deleted all of the clips I ddint use so that my timeline was just the clip I edited. Then I exported it and uploded it onto my blog.
Multi camera angles

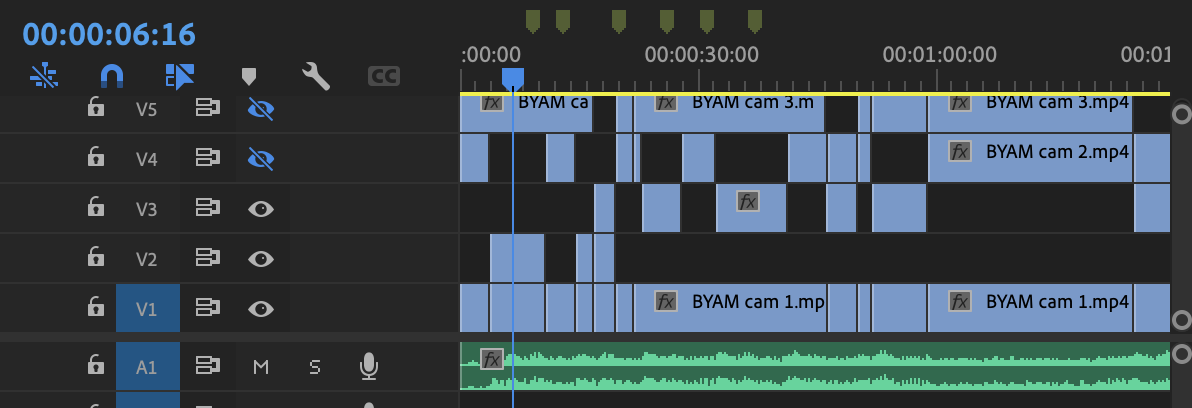
For this task I had to use multiple angles for a duo singing and make a live performance video. I cut from person to person depending on who was singing at that point. I started by downloading the 3 different camera angles and audio track, then uploading them to premiere pro to edit them.


First I started by adding the audio tack to the timeline and then adding one of the video angles above and synchorizes them together so it plays in time. I did this by highlighting both tacks and right clicking and finding the synchronize button. Once on this menu I made sure I pressed audio so it only synced the audio. I repeated this with the two other angled clips until I had 3 angles all synchronized to the music track.

I then started editing my footage and to do this I added some markers to help wth making sure it would change on beat. I did this by playing the audio and everytime there was a beat I would press "M" this added the marker line on the timeline. this helped as it meant you can easily place them to the beat accurtaly as they snap in place.
I didn't want it to stay on one camera angle so I switched from the two shot to close ups throughout the video. This gave it good variation which was more entertaining to watch. This let me experiment more with edting and how to show this live performance in the best way. I copied this process throughout the entire video and then rewatched it to make sure it changed on beat and in time with the rhythm. The style I decided to use worked well.
At the end the camera work gets awkward and they zoom in to one of the singers making the footage filmed unusable since this brings the quality of the video down. This annoyed me as then I couldn't use this footage and the camera angles started lacking since I could only use two and not three. This caused the task to not go as well as i would have wanted.
Black and White colour change
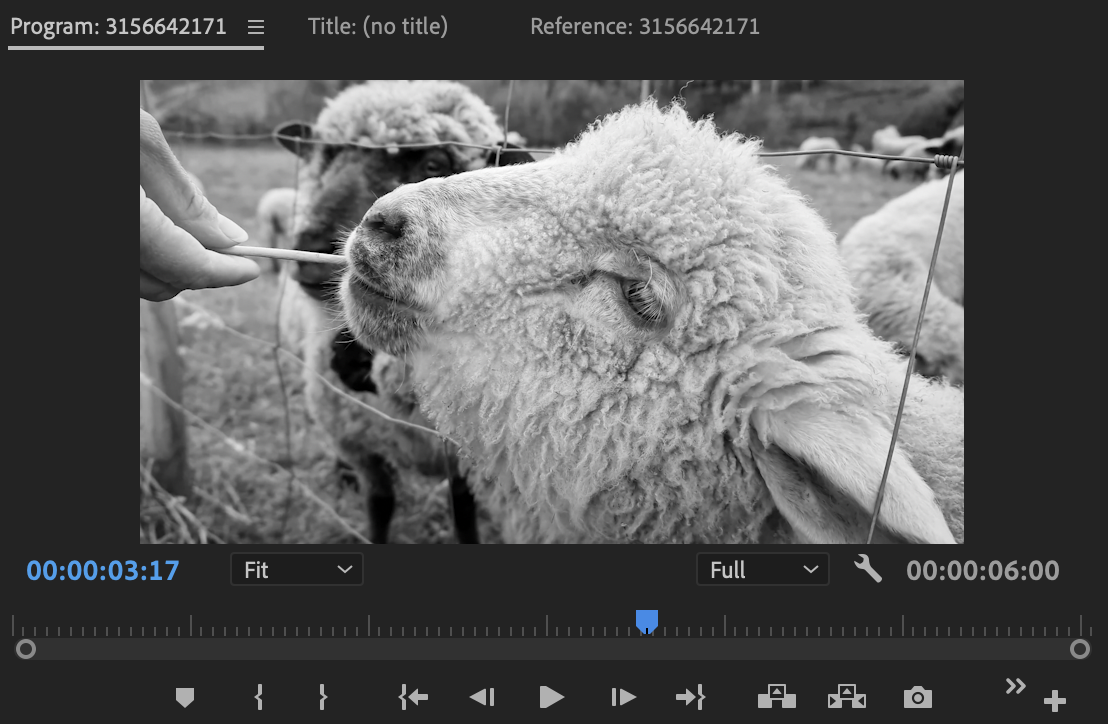
For this class task we had to make the video we pick of pexels black and white. So first thing I did was download a video of the site pexels, I choose a sheep one. Then I uploaded this video to premiere pro and dragged it to the timeline.

To get the effect I typed '2 Strip' into the effects bar and then dragged this preset onto my sheep video. To see the effect controls I pressed the video on the timeline and went to the control panel on the left. This panel had a lot of options but to make it black and white I used the 'Saturation' effect and pulled it down to 0. I had previously just had a black and white video but I decided I wanted to add transitions in. I wanted the video to start with colour and fade into black and white.


To do this I Added a keyframe at the start at 100 and then around half way through I added another with it at 0. This meant it faded into black and white slowly and you could see the contrast. I then found this Tint effect above it and played around with it and found it made it darker and stand out clearer. So I had the tint start at the same time the saturation ends letting it become more defined.

After I added the two effects I watched back and made sure it all worked together then exported it from premiere pro. After that, I put it on youtube and uploaded it to my blog.
Colour Isolate

The first thing I did was download the video from Activate Learning to then uplode to premiere pro. I started following a tutorial that my tutor created but as I was on my own laptop I didn't have all the effects since I had the updated version of the software. Because of this we had to use a different effect called Lumetri Color. I found this effect in the effect bar and then dragged I onto my clip.

The goal for this task was to highlight the women red coat by making all the other colours in the frame monochrome. The effect I found has many options to change the colour but I chose to use the 'Hue vs Sat' In this, there was a line with all the colours o it and I wanted to prioritise the red hue so I added a point to the red area and moved it to the top of the screen. This made the red brighter which defined the red jacket better.
Next, I needed to get rid of the other colours on the screen so I added points throughout the line on the different colours and then dragged them down to the bottom of the screen. This took away all the colours making them black and white other than the red jacket.
Throughout this process, I played around with the bottom and red points as it left an orange hue on her face. By moving them around I could experiment with each placement and find the right one which made the majority of the background black and white. This took a while however once I found the right place I was happy with it.

Lastly, I needed to export it from premier pro and upload it to youtube. After that, I put it on my blog and could reflect on the task.
Colour hype
To do this I downloaded the video I needed of Activate Learning and uploaded it to premiere pro so I could start the task. As I was working on my laptop I didn't have all the effects needed for this activity.


To start off I wanted my clip to be changing colours throughout keeping it crazy and hype. To do this I found a colour palette wheel in the Lumetri Colour section on the effect bar. Once on that effect I pressed a colour on the wheel then made a keyframe and continued that process making sure the colours I picked were spread out and varied. This meant all the colours were continuously changing and brining a disco look to the video.
Then I dragged the Solarizes effect onto the video which i found in the effect bar. With this effect I randomly choose levels like 30 and made a keyframe then increased or decreased the levels throughout the clip. When doing that I made a keyframe for each one. The effect is this trippy style that changes the contrast making the colours brighter. Overall this is a unique technical effect.


Bibliography My Bib task
Works Cited
Fnatic, et al. How to Be a Professional Gamer an ESports Guide to League of Legends. Random House, 6 Oct. 2016, p. 256, www.google.co.uk/books/edition/How_To_Be_a_Professional_Gamer/NPgnDAAAQBAJ?hl=en&gbpv=1.
published, Tyler Colp. "Elden Ring Review." Pcgamer, 23 Feb. 2022, www.pcgamer.com/elden-ring-review/.
Survivalist. "How to Improve at Age of Empires 2 - Part 1: Fundamentals [ES/简体/繁體 SUBS]." Www.youtube.com, 18 Sept. 2022, youtu.be/gG255lCtNdM.
To do this I watched a tutorial video on how to use my bib as I had never used this site before. Once I understood what to do I found the examples I needed to use and copy and pasted the URLS into the site by using the add reference button. But when in the reference bar I had to add information from the websites/videos/ebook. When the extra information like the date it was published and author name was placed in you could save that reference and move onto the next one. The more information you add in the more detailed your reference is. After I had completed all three I downloaded it all and copy and pasted it onto my blog which is shown on the left.
Sharing is caring
For this class task we had to find a music video that had a creative technique like; trippy editing, animation, audio effects or more technical aspects. I found a My chemical romance music video called Welcome to the balck parade which had multiple techniques making it visually unique. This music video is in a square format and turns to black and white part way through. This gives off a retro old vibe which id like to try and achieve for my music video. By doing this it would make my video have a more distinctive style and be recognisable.
CC Light Rays
To start this class task
Glow Line


Puppet Animation


